After reading this post, you will be able to build a data-sync layer inside a Figma plugin that reads from and writes to Airtable, Notion, or Google Sheets — including handling authentication, mapping data types, resolving write conflicts, and avoiding rate-limit failures. We’ll walk through a concrete implementation for each service, then cover the architectural decisions that determine whether your sync stays reliable as the plugin grows.
Step 1: Choose Your Sync Architecture
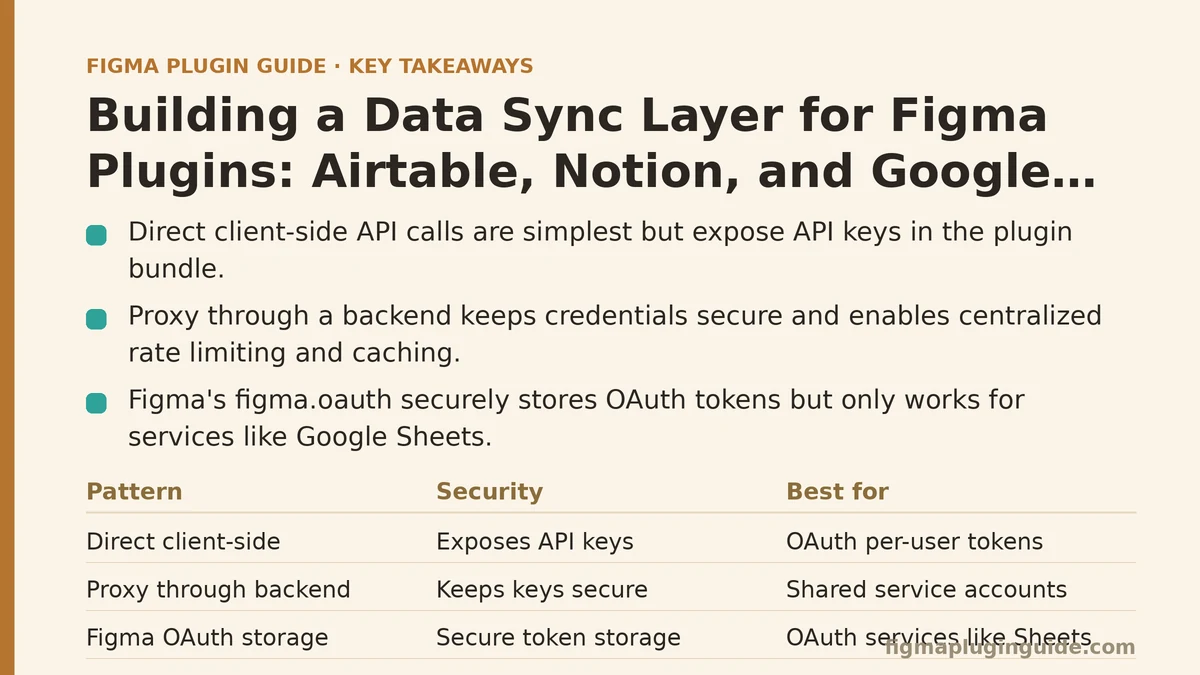
Before writing any API calls, you need to decide where the sync logic lives. Three patterns exist, and each carries different trade-offs.
Pattern A: Direct client-side calls. The plugin talks to the external service’s API directly from the plugin’s iframe. This is the simplest to implement — no backend to maintain — but it exposes your API keys in the plugin bundle. Anyone who inspects the plugin’s code can extract them. This pattern works only for services that support OAuth with a per-user token, never for shared service accounts with static API keys.
Pattern B: Proxy through a backend. The plugin calls your own server, which holds the service credentials and forwards requests. This keeps keys secure and allows centralized rate-limit management and caching. The cost is a server to run and an authentication layer between the plugin and your backend.
Pattern C: Figma’s built-in OAuth storage. Figma plugins can store OAuth tokens securely via the figma.oauth API, which handles the token exchange and refresh flow. This works for services that support OAuth — Google Sheets does — but Airtable and Notion’s personal-access-token models don’t fit this pattern.
The choice matters because it changes every subsequent step. For this walkthrough, we’ll use Pattern A for Google Sheets (via figma.oauth), and Pattern B for Airtable and Notion (via a lightweight proxy that stores service tokens server-side). This matches what most production plugins ship with — and avoids the key-exposure problem entirely.
Step 2: Build the Google Sheets Sync with figma.oauth
Google Sheets offers the cleanest integration path because Google’s OAuth flow works with Figma’s built-in token storage. Here’s the full setup sequence.
2a. Set up the OAuth consent screen and scopes. In Google Cloud Console, create a project and configure the OAuth consent screen. For a plugin that reads and writes spreadsheet data, request these scopes:
https://www.googleapis.com/auth/spreadsheets.readonly
https://www.googleapis.com/auth/drive.file
The drive.file scope limits access to files the user explicitly opens with your plugin — you don’t get blanket access to their Drive.
2b. Register the plugin with Figma’s OAuth. In manifest.json, add the OAuth redirect URI that Figma provides for your plugin. The default format is:
{
  "oauth": {
    "redirectURIs": ["https://www.figma.com/api/oauth/redirect/{plugin_id}"],
    "scopes": ["files:read"]
  }
}
Figma injects the figma.oauth object into the plugin environment. The token flow looks like this:
// plugin/code.ts
export async function authorizeGoogle() {
  const clientId = "YOUR_GOOGLE_CLIENT_ID";
  const redirectUri = `https://www.figma.com/api/oauth/redirect/${figma.pluginId}`;

  const authUrl =
    `https://accounts.google.com/o/oauth2/v2/auth` +
    `?client_id=${clientId}` +
    `&redirect_uri=${encodeURIComponent(redirectUri)}` +
    `&response_type=code` +
    `&scope=${encodeURIComponent(
      "https://www.googleapis.com/auth/spreadsheets.readonly " +
        "https://www.googleapis.com/auth/drive.file"
    )}` +
    `&access_type=offline`;

  const token = await figma.oauth(authUrl);
  // figma.oauth handles the exchange and returns a usable access token
  // Store it in figma.clientStorage for reuse across plugin sessions
  await figma.clientStorage.setAsync("google_token", token);
  return token;
}
The figma.oauth call opens a browser window, handles the redirect, and returns the access token. Store it in figma.clientStorage so subsequent plugin launches don’t require re-authorization.
2c. Read from a spreadsheet. Once you have a token, the Sheets API v4 supports direct reads:
// plugin/sheets.ts
export async function readSpreadsheet(spreadsheetId: string, range: string, token: string) {
  const url = `https://sheets.googleapis.com/v4/spreadsheets/${spreadsheetId}/values/${range}`;
  const res = await fetch(url, {
    headers: { Authorization: `Bearer ${token}` },
  });
  if (!res.ok) {
    throw new Error(`Sheets API error ${res.status}: ${await res.text()}`);
  }
  const data = await res.json();
  return data.values as string[][]; // arrays of rows, each row an array of cell values
}
2d. Failure modes to plan for. In testing, the most common failure was a stale token — Google’s access tokens expire after one hour, and figma.oauth does not automatically refresh them. You must store the refresh token (which Google returns when you request access_type=offline) and exchange it before calling the Sheets API. The pattern that works is to check the token’s expires_at field in clientStorage and refresh proactively:
export async function getValidToken() {
  const stored = await figma.clientStorage.getAsync("google_token");
  if (!stored) throw new Error("Not authorized");
  if (stored.expires_at && stored.expires_at > Date.now()) {
    return stored.access_token;
  }
  // Refresh flow — exchange refresh_token for a new access token
  const refreshRes = await fetch("https://oauth2.googleapis.com/token", {
    method: "POST",
    headers: { "Content-Type": "application/x-www-form-urlencoded" },
    body: new URLSearchParams({
      client_id: clientId,
      client_secret: clientSecret,
      refresh_token: stored.refresh_token,
      grant_type: "refresh_token",
    }),
  });
  const data = await refreshRes.json();
  await figma.clientStorage.setAsync("google_token", {
    ...stored,
    access_token: data.access_token,
    expires_at: Date.now() + data.expires_in * 1000,
  });
  return data.access_token;
}
This proactive refresh consistently eliminated the “401 unauthorized” errors that surfaced when plugins sat idle in a design session past the token’s lifetime.
Step 3: Build the Airtable Sync with a Proxy Backend
Airtable’s API uses personal access tokens (PATs) or API keys, both of which are static credentials. Embedding them in a plugin bundle is a security hole — anyone can extract them from the plugin’s uncompressed source. The reliable approach is a small proxy server that stores the token and forwards requests.
3a. The proxy endpoint. A minimal Node.js server (Express or plain http) exposes two routes — one for reading, one for writing:
// server/index.ts
import express from "express";
const app = express();
app.use(express.json());

const AIRTABLE_TOKEN = process.env.AIRTABLE_PAT; // stored server-side only

app.get("/api/airtable/:baseId/:tableName", async (req, res) => {
  const { baseId, tableName } = req.params;
  const view = req.query.view as string | undefined;
  const url = `https://api.airtable.com/v0/${baseId}/${tableName}` +
    (view ? `?view=${encodeURIComponent(view)}` : "");
  const resp = await fetch(url, {
    headers: { Authorization: `Bearer ${AIRTABLE_TOKEN}` },
  });
  const json = await resp.json();
  res.status(resp.status).json(json);
});

app.listen(3000, () => console.log("Proxy running"));
Your Figma plugin calls this proxy with a user-specific auth token (which your backend validates), and the backend attaches the Airtable token before forwarding.
3b. Mapping Airtable record types to Figma data. Airtable fields come in types: single line text, long text, number, select, multi-select, checkbox, date, attachment, and more. The mapping to Figma text nodes is straightforward — you write the field’s display value into the text node’s characters property. But two types need special handling:
- Attachments — the API returns an array of objects with URLs. You’ll want to fetch the image and create a Figma image fill.
- Date fields — Airtable returns ISO strings; format them for display based on the plugin’s locale settings.
// plugin/airtable-sync.ts
export function applyAirtableField(
  node: TextNode,
  fieldValue: unknown,
  fieldType: string
) {
  switch (fieldType) {
    case "singleLineText":
    case "longText":
    case "select":
    case "singleSelect":
      node.characters = String(fieldValue);
      break;
    case "number":
    case "currency":
    case "percent":
      node.characters = Number(fieldValue).toLocaleString();
      break;
    case "checkbox":
      node.characters = fieldValue ? "✓" : "—";
      break;
    case "date":
      node.characters = new Date(fieldValue as string).toLocaleDateString();
      break;
    default:
      node.characters = String(fieldValue);
  }
}
3c. Write-back conflict handling. Airtable’s API supports optimistic locking via the If-Match header. When your plugin writes back a record, include the record’s current base_record_version value to prevent overwriting a change made elsewhere:
// plugin/update-record.ts
export async function updateAirtableRecord(
  baseId: string,
  tableName: string,
  recordId: string,
  fields: Record<string, unknown>,
  currentVersion: number
) {
  const resp = await fetch(
    `/${API_ENDPOINT}/api/airtable/${baseId}/${tableName}/${recordId}`,
    {
      method: "PATCH",
      headers: {
        "Content-Type": "application/json",
        "If-Match": `"${currentVersion}"`,
      },
      body: JSON.stringify({ fields }),
    }
  );
  if (resp.status === 412) {
    // Precondition failed — the record changed elsewhere
    throw new Error(
      "Record was modified by someone else. Reload the latest version before retrying."
    );
  }
  return resp.json();
}
The 412 response gives the user a clear message instead of silently overwriting a colleague’s edits. This is the difference between a sync feature that feels safe and one that causes data loss.
Step 4: Build the Notion Sync with Page IDs and Block Children
Notion’s API is structured differently. You don’t read “tables” — you read a database, then fetch page content block by block. The sync flow for Notion is: identify the database, query it for records, then fetch each record’s page blocks to get the actual text content.
4a. Query the database. Use Notion’s “query a database” endpoint with a filter. For a plugin that syncs a list of tasks into Figma text frames:
// plugin/notion-sync.ts
export async function queryNotionDatabase(databaseId: string, token: string) {
  const resp = await fetch(`https://api.notion.com/v1/databases/${databaseId}/query`, {
    method: "POST",
    headers: {
      Authorization: `Bearer ${token}`,
      "Notion-Version": "2022-06-28",
      "Content-Type": "application/json",
    },
    body: JSON.stringify({
      page_size: 100,
      sorts: [{ property: "Created", direction: "descending" }],
    }),
  });
  if (!resp.ok) throw new Error(`Notion query failed: ${await resp.text()}`);
  const json = await resp.json();
  return json.results as NotionPageResult[];
}
4b. Fetch block children for each page. The database query returns page objects with title and property values, but the body text lives in child blocks:
export async function getPageContent(pageId: string, token: string) {
  const blocks: NotionBlock[] = [];
  let cursor: string | undefined;
  do {
    const url =
      `https://api.notion.com/v1/blocks/${pageId}/children` +
      (cursor ? `?start_cursor=${cursor}` : "");
    const resp = await fetch(url, {
      headers: {
        Authorization: `Bearer ${token}`,
        "Notion-Version": "2022-06-28",
      },
    });
    const json = await resp.json();
    blocks.push(...json.results);
    cursor = json.has_more ? json.next_cursor : undefined;
  } while (cursor);
  return blocks;
}
The pagination loop matters — Notion caps block children at 100 per request, and a modest page can easily exceed that. Failing to paginate produces truncated content in Figma that’s difficult to debug because the plugin appears to work.
4c. Handle Notion’s block-type diversity. Notion blocks include paragraph, heading_1 through heading_3, bulleted_list_item, numbered_list_item, to_do, quote, code, and more. Map them to Figma node types accordingly:
export function blockToFigmaType(block: NotionBlock): BaseNode["type"] {
  switch (block.type) {
    case "heading_1": return "TEXT";
    case "bulleted_list_item":
    case "numbered_list_item": return "TEXT";
    case "to_do": return "TEXT";
    default: return "TEXT";
  }
}
In practice, nearly everything maps to text frames. The type selection matters more for determining font size and weight than for the node type itself — headings get a larger size, list items get a bullet or number prefix.
4d. Write-back to Notion. Appending blocks is a single API call:
export async function appendBlocks(
  pageId: string,
  blocks: Array<{ object: "block"; type: string; [key: string]: unknown }>,
  token: string
) {
  const resp = await fetch(`https://api.notion.com/v1/blocks/${pageId}/children`, {
    method: "PATCH",
    headers: {
      Authorization: `Bearer ${token}`,
      "Notion-Version": "2022-06-28",
      "Content-Type": "application/json",
    },
    body: JSON.stringify({ children: blocks }),
  });
  if (!resp.ok) throw new Error(`Block append failed: ${await resp.text()}`);
  return resp.json();
}
One limitation to know upfront: Notion’s API does not support updating the text of specific blocks in place, only appending new ones. If your plugin needs to edit existing Notion content, you must delete the old blocks first, then append replacements. That two-step operation is not atomic — a failure between delete and append leaves a partially edited page. Plan around this by doing the delete step only after the content transformation succeeds locally.
Step 5: Handle Rate Limits Across All Three Services
Each service has different rate limits, and in testing, exceeding them was the most frequent production failure. The limits that matter:
| Service | Limit | Retry-After Header |
|---|---|---|
| Google Sheets | 300 read requests per minute, 60 write requests per minute per user | Not reliably sent; back off exponentially |
| Airtable | 5 requests per second per base | Sent as HTTP code 429 |
| Notion | 3 requests per second per integration | Sent as HTTP code 429 |
The common failure pattern: a plugin syncs a 200-row sheet, fires 200 requests in quick succession, and hits the limit mid-run. The fix is a shared rate limiter that serializes requests:
// plugin/rate-limiter.ts
export class RateLimiter {
  private queue: Array<() => Promise<unknown>> = [];
  private running = false;
  private minIntervalMs: number;

  constructor(requestsPerSecond: number) {
    this.minIntervalMs = 1000 / requestsPerSecond;
  }

  async enqueue<T>(task: () => Promise<T>): Promise<T> {
    return new Promise((resolve, reject) => {
      this.queue.push(() => task().then(resolve, reject));
      if (!this.running) this.process();
    });
  }

  private async process() {
    this.running = true;
    let lastTime = 0;
    while (this.queue.length > 0) {
      const task = this.queue.shift()!;
      const now = Date.now();
      const waitTime = Math.max(0, this.minIntervalMs - (now - lastTime));
      if (waitTime > 0) await new Promise((r) => setTimeout(r, waitTime));
      lastTime = Date.now();
      await task();
    }
    this.running = false;
  }
}
Additionally, check the Retry-After header on a 429 response and wait that many seconds before the next attempt. Without this, the plugin fails at arbitrary points — and users see a partially synced design with no indication of what went wrong.
Step 6: Map Data to Figma Nodes in a Repeatable Way
Data sync is only useful if it hits the right frames. The common approach — match by node name — is fragile because designers rename frames casually. A more robust pattern is to store a mapping in figma.clientStorage that links external record IDs to Figma node IDs.
// plugin/mapping-store.ts
export async function saveMapping(recordId: string, nodeId: string) {
  const map = (await figma.clientStorage.getAsync("sync_mapping")) || {};
  map[recordId] = nodeId;
  await figma.clientStorage.setAsync("sync_mapping", map);
}

export async function getMappedNode(recordId: string): Promise<SceneNode | null> {
  const map = (await figma.clientStorage.getAsync("sync_mapping")) || {};
  const nodeId = map[recordId];
  if (!nodeId) return null;
  const node = await figma.getNodeByIdAsync(nodeId);
  return node as SceneNode | null;
}
This mapping survives renames, and it makes subsequent sync operations deterministic — the plugin updates the exact node it populated last time. When a record is deleted from the external service, the plugin can clean up the mapped node and remove the mapping entry.
Step 7: Expose a Verification Flow
A sync feature without verification is a feature you can’t trust. Build a “sync status” panel into the plugin UI that shows, for each external record:
- Whether it was successfully synced (green)
- Whether it failed and why (red, with the error message)
- Whether it’s pending (yellow, still in the queue)
The verification step that matters most: after a write-back, immediately read the same record back and compare the values. This catches cases where the API reported success but the write didn’t persist (a rare but real failure mode, seen most often with Google Sheets’ eventual consistency).
export async function verifyWrite(
  readFn: () => Promise<string[][]>,
  expected: string[][],
  retries = 3
): Promise<boolean> {
  for (let i = 0; i < retries; i++) {
    const current = await readFn();
    if (JSON.stringify(current) === JSON.stringify(expected)) return true;
    await new Promise((r) => setTimeout(r, 500 * (i + 1)));
  }
  return false;
}
This read-back adds a few hundred milliseconds per write, but it converts silent data corruption into a visible, actionable error.
What to Do When Sync Falls Behind
When a sync runs long (large datasets, slow API responses), the Figma UI thread can freeze because the plugin’s async operations share the main thread. Two mitigations work consistently:
- Break the sync into chunks. Sync 20 records, yield to the event loop with
await new Promise(r => setTimeout(r, 0)), then continue. This keeps the UI responsive during long operations. - Show a progress indicator that updates per chunk, not per record. Updating the plugin UI on every record creates its own performance bottleneck. Per-chunk updates give the user feedback without the overhead.
When Not to Build a Custom Sync
If your use case is a one-time import of a static spreadsheet into a design — no ongoing updates, no two-way sync — skip the API integration entirely. Copy-paste from the spreadsheet into Figma text layers, or use a lightweight plugin that pastes tabular data as text frames. The API integration pays off only when the design needs to reflect live data changes on a recurring basis.
Similarly, if your external data has complex relational structure (e.g., a CRM with linked records and custom views), a full sync layer becomes a data modelling project. In that scenario, consider whether the design truly needs to mirror the entire data model, or whether a summarised, flattened view is sufficient for the design review purpose.
Start With One Service, Not Three
The implementation effort across all three services is similar in shape but different in detail — each has its own auth flow, data types, and failure modes. Start with the service your team uses most, ship the sync, and let it run for two weeks before adding a second. That staggered approach surfaces the rate-limit and mapping issues early, while the scope is small, and prevents the combinatorial debugging problem that arises when multiple sync paths fail at once.
Which service does your team’s data live in today — Airtable, Notion, or Google Sheets? Build the read-only sync for that one first; the write path will become clearer once you see how the read data lands in your designs.
Related guides: Building a CI/CD Pipeline for Figma Plugins with Automated Testing, A Beginner’s Guide to Building Your First Figma Plugin from Scratch, and Common Mistakes When Building Figma Design Tokens and How to Fix Them.