A design token exporter is a Figma plugin that reads structured values — colors, spacing, typography, and effect definitions — from a Figma file and writes them out in a format other tools can consume, typically JSON, CSS custom properties, or SCSS variables. The plugin itself is small. The interesting parts are learning the plugin runtime model, understanding how Figma stores token-like data, and choosing a serialization format that survives the round trip into code.
This tutorial walks through building one from an empty folder to a working export. It assumes you can read JavaScript and have used Figma as a designer or developer, but it does not assume any prior plugin development.
Step 1: Understand the Plugin Runtime Before Writing Code
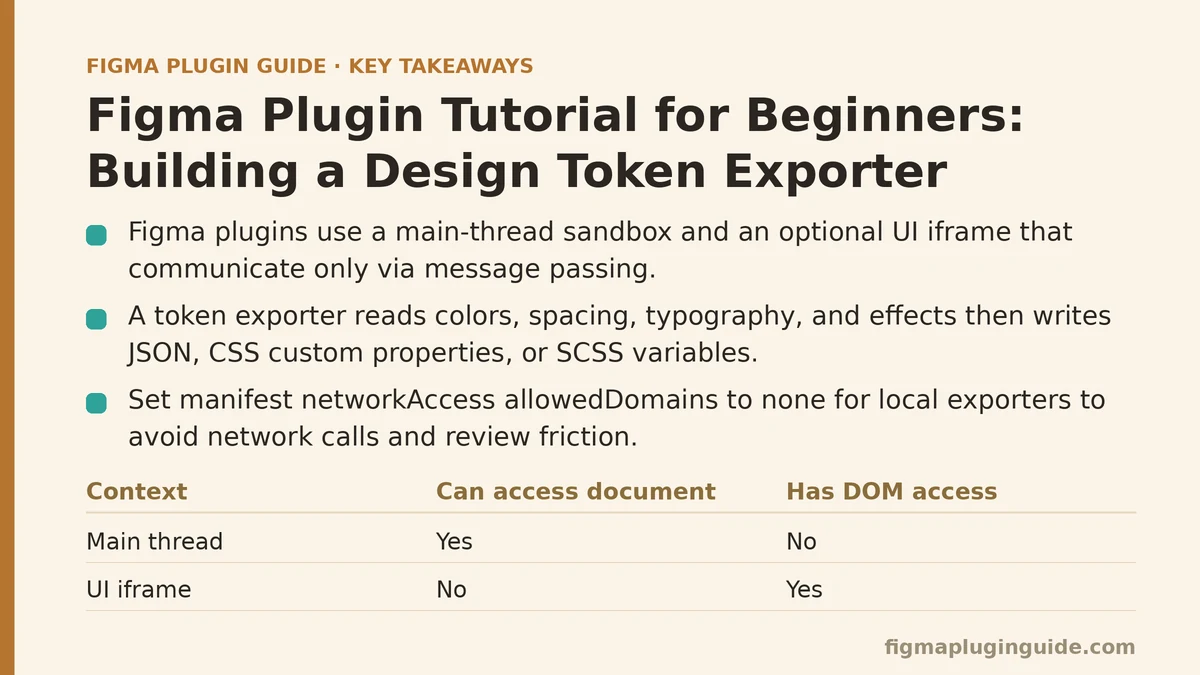
Figma plugins run in two separate JavaScript contexts that cannot share memory directly:
- The main thread runs in a sandbox without DOM access. It can call the
figmaglobal API to read and modify the document. - The UI iframe runs in a normal browser context with DOM,
window, andfetch. It can render a plugin panel but cannot touch the document.
The two communicate through message passing: figma.ui.postMessage() from the main thread, parent.postMessage() from the UI, and figma.ui.onmessage / window.onmessage listeners on the other side. Every value crossing that boundary must be structured-cloneable — no functions, no class instances, no DOM nodes.
Design token exporters rarely need a rich UI. A common pattern is a UI iframe that shows a small panel with format options and an export button, while the main thread does all the reading. If your exporter only outputs a single fixed format, you can skip the UI entirely and have main write to figma.ui never — you call figma.closePlugin() when done.
When not to use this two-file structure: if all you need is a one-shot export with no confirmation dialog, skip the iframe. The iframe adds a build target, a second entry point, and a message protocol you now have to maintain. Add it only when you need interactive options or a preview.
Step 2: Scaffold the Plugin Files
Create a project folder with the four files every Figma plugin needs: manifest.json, code.ts (or .js), ui.html, and a build setup. The manifest is the file Figma reads to know what to load.
{
  "name": "Token Exporter",
  "id": "000000000000000000",
  "api": "1.0.0",
  "main": "dist/code.js",
  "ui": "dist/ui.html",
  "editorType": ["figma"],
  "networkAccess": {
    "allowedDomains": ["none"]
  }
}
Three fields matter more than the rest:
mainmust point to the compiled main-thread bundle. If you point it at a TypeScript source file, Figma will fail to load with a parse error.uipoints at the HTML file that becomes your iframe. Omit it entirely if you have no UI.networkAccessdeclares which external domains the plugin can reach. SettingallowedDomains: ["none"]is the correct default for a local exporter — no network calls, no review friction when publishing.
For a docs-style local export, you do not need a bundler. A minimal setup with esbuild is enough:
npm init -y
npm install --save-dev esbuild typescript @figma/plugin-typings
Then a build script that produces both targets:
{
  "scripts": {
    "build": "esbuild code.ts --bundle --outfile=dist/code.js --target=es2017 --format=iife",
    "watch": "esbuild code.ts --bundle --outfile=dist/code.js --target=es2017 --format=iife --watch"
  }
}
--format=iife is the important flag. Figma’s main-thread sandbox does not provide a module loader, so ESM or CommonJS output will throw at runtime. Wrap everything in an IIFE and let esbuild inline your imports.
Step 3: Read Token Data From the Document
Figma stores reusable design values in two places that both look like tokens, depending on the file’s age and the team’s workflow:
Local variables (Variables API, available in figma.variables) hold named values with modes and are scoped to a collection. They cover color, number, string, and boolean types.
Styles (Paint, TextStyle, EffectStyle) are the older mechanism and predate variables. They are still common in mature files.
A useful exporter reads both. Start with variables because they carry more structure:
// code.ts — read all local variable collections and their tokens
type Token = {
  name: string;
  collection: string;
  type: VariableResolvedDataType;
  valuesByMode: Record<string, VariableValue>;
};

function collectVariableTokens(): Token[] {
  const tokens: Token[] = [];
  const collections = figma.variables.getLocalVariableCollections();

  for (const collection of collections) {
    const modes = collection.modes.map((m) => ({ id: m.modeId, name: m.name }));
    const variableIds = collection.variableIds;

    for (const id of variableIds) {
      const variable = figma.variables.getVariableById(id);
      if (!variable) continue;

      const valuesByMode: Record<string, VariableValue> = {};
      for (const mode of modes) {
        const value = variable.valuesByMode[mode.id];
        if (value !== undefined) {
          valuesByMode[mode.name] = value;
        }
      }

      tokens.push({
        name: variable.name,
        collection: collection.name,
        type: variable.resolvedType,
        valuesByMode,
      });
    }
  }

  return tokens;
}
Two failure modes to plan for here:
Aliased values. A variable’s value may be a VARIABLE_ALIAS object rather than a raw color or number. That object looks like { type: "VARIABLE_ALIAS", id: "<variable-id>" }. If you serialize it directly, your JSON output contains an opaque ID, not a usable value. You either resolve aliases by looking up the target variable, or preserve them and emit a reference syntax like {color.brand.primary}. Both are valid; the wrong choice is to leave them unresolved without telling the consumer.
Mixed or missing modes. A variable can be defined for one mode and undefined for another. The code above skips undefined modes rather than emitting null, which prevents downstream tools from treating a missing value as an intentional empty string.
For styles, the shape differs. Use figma.getLocalPaintStyles(), figma.getLocalTextStyles(), and figma.getLocalEffectStyles(), then read properties like paints[0].color, fontSize, and effects. Note that figma.getLocalPaintStyles() returns only styles whose remote property is false — library styles from a published file are not included unless you also query figma.teamLibrary.
Step 4: Serialize to the Target Format
The whole point of separating collection from serialization is that you write the collector once and swap the serializer per output format. Three formats cover most handoff needs.
JSON preserves modes and reference structure. This is the format a token pipeline (Style Dictionary, Tokens Studio, or a custom build step) is most likely to ingest.
function toJson(tokens: Token[]): string {
  const out: Record<string, any> = {};
  for (const t of tokens) {
    const path = t.name.split("/");
    let cursor = out;
    for (let i = 0; i < path.length - 1; i++) {
      cursor[path[i]] ??= {};
      cursor = cursor[path[i]];
    }
    cursor[path[path.length - 1]] = t.valuesByMode;
  }
  return JSON.stringify(out, null, 2);
}
CSS custom properties flatten the tree into --collection-name-path variables. Modes map to selectors — :root for the default mode, a [data-mode="dark"] attribute selector for alternates. This is the format you hand to a web frontend directly.
SCSS variables follow the same flattening, but emitted as $name: value; with a lighten() or rgba() helper when the underlying token is a color with opacity. SCSS has the practical limitation that map-get lookups defeat IDE autocomplete in most editors, so many teams prefer CSS variables even in SCSS-based projects.
The conversion functions themselves are short:
function rgbToHex({ r, g, b }: RGB): string {
  const toByte = (v: number) => Math.round(v * 255).toString(16).padStart(2, "0");
  return `#${toByte(r)}${toByte(g)}${toByte(b)}`;
}

function toCssVars(tokens: Token[], defaultMode: string): string {
  const lines: string[] = [":root {"];
  for (const t of tokens) {
    const value = t.valuesByMode[defaultMode];
    if (value === undefined || typeof value !== "object") continue;
    const slug = `${t.collection}-${t.name}`.toLowerCase().replace(/[\/\s]+/g, "-");
    if ("r" in value && "g" in value) {
      lines.push(`  --${slug}: ${rgbToHex(value as RGB)};`);
    }
  }
  lines.push("}");
  return lines.join("\n");
}
Note the if (value === undefined || typeof value !== "object") guard. String and boolean tokens would otherwise be silently dropped by the "r" in value check further down, which is intentional: this serializer only handles colors. A complete token exporter would branch on t.type and emit each type appropriately.
Step 5: Wire the UI and Handle the Export
The UI iframe is where you offer format selection and a download. Figma plugins cannot write files to the user’s disk directly — the standard workaround is to send the string content back to the UI, let the UI construct a Blob, and trigger a download via an <a download> element.
The message protocol is small:
<!-- ui.html -->
<button id="export-json">Export JSON</button>
<button id="export-css">Export CSS</button>
<script>
  document.getElementById("export-json").onclick = () =>
    parent.postMessage({ pluginMessage: { type: "export", format: "json" } }, "*");
  document.getElementById("export-css").onclick = () =>
    parent.postMessage({ pluginMessage: { type: "export", format: "css" } }, "*");

  onmessage = (event) => {
    const msg = event.data.pluginMessage;
    if (msg?.type === "download") {
      const blob = new Blob([msg.content], { type: "text/plain" });
      const url = URL.createObjectURL(blob);
      const a = document.createElement("a");
      a.href = url;
      a.download = msg.filename;
      a.click();
      URL.revokeObjectURL(url);
    }
  };
</script>
On the main thread, the corresponding handler reads the current format option, runs the collector, serializes, posts back, and closes:
figma.showUI(__html__, { width: 320, height: 180 });

figma.ui.onmessage = (msg) => {
  if (msg?.type !== "export") return;

  const tokens = collectVariableTokens();
  let content = "";
  let filename = "";

  if (msg.format === "json") {
    content = toJson(tokens);
    filename = "tokens.json";
  } else if (msg.format === "css") {
    const collections = figma.variables.getLocalVariableCollections();
    const defaultMode = collections[0]?.modes[0]?.name ?? "Default";
    content = toCssVars(tokens, defaultMode);
    filename = "tokens.css";
  }

  figma.ui.postMessage({ type: "download", content, filename });
  figma.closePlugin();
};
A failure mode worth naming: figma.closePlugin() immediately after postMessage can race with the UI’s message handler in some Figma desktop versions. If users report the download not firing, move closePlugin into a setTimeout(..., 0) or have the UI post a done message back that triggers the close. The race is transient and version-dependent, but silently dropping downloads is the kind of bug that makes a useful plugin feel broken.
Step 6: Verify the Output Before You Ship
Testing a plugin is different from testing a regular library because the figma global is not available in Node. Two approaches work:
Unit-test the serializers. The toJson and toCssVars functions take plain data and return strings. There is no Figma API involved. Feed them a handcrafted Token[] array in a Jest or Vitest test and assert the output string. This is where most bugs live, and they are all catchable without the Figma runtime.
Mock figma for the collector. Build a minimal object shaped like the API surface your collector touches:
const mockFigma = {
  variables: {
    getLocalVariableCollections: () => [
      { name: "color", modes: [{ modeId: "m1", name: "Light" }], variableIds: ["v1"] },
    ],
    getVariableById: (id: string) => ({
      name: "brand/primary",
      resolvedType: "COLOR",
      valuesByMode: { m1: { r: 1, g: 0, b: 0 } },
    }),
  },
};
Inject it as a global before importing the collector. Any time the collector calls a figma method your mock does not define, the test fails loudly. That is the desired behavior — an over-permissive mock that returns undefined for everything will pass code that crashes against the real API.
Manual verification still matters. Open a real Figma file with known variables, run the plugin, and diff the exported JSON against the file’s Variables panel. Modes, aliases, and scoped variables all have edge cases that are cheaper to spot by eye than to encode in a mock.
Step 7: Know What Not to Include
A short export is easier to consume than a complete one. Three things look like tokens but are usually better left out of a first version:
- Style references inside components. A variable that happens to be used only inside a single component is still a token, but a component-specific style override is not. Including every override turns a token file into a component inventory.
- Paints on the document itself. The canvas background is a document property, not a reusable token, and it will confuse a consumer expecting brand colors.
- Everything from every collection. If the file contains a private scratch collection alongside the real token collection, filter by collection name via an allowlist. This is a one-line change that prevents weeks of downstream cleanup.
A caution on the opposite side: do not filter so aggressively that modes disappear. Multi-mode tokens are the main reason to use variables over styles, and dropping alternate modes to simplify the output defeats the purpose.
What to Build Next
Once a single-format export works, the natural extensions are: resolving VARIABLE_ALIAS values into nested JSON, reading styles in addition to variables, reading published library variables via figma.teamLibrary, and renaming files to include a timestamp so repeated exports do not overwrite each other.
Each of those is a self-contained addition. The architecture from this tutorial — collect into a plain array, serialize per format, hand the string to the UI for download — supports all of them without restructuring.
Which of these extensions matters most for the design system you work with — alias resolution, style coverage, or library variables? The right starting point is whichever gap is blocking the file handoff today.
Related guides: Step-by-Step Guide to Building a Color Contrast Checker Figma Plugin for Beginners, A Beginner’s Guide to Building Your First Figma Plugin from Scratch, and Common Mistakes When Building Figma Design Tokens and How to Fix Them.